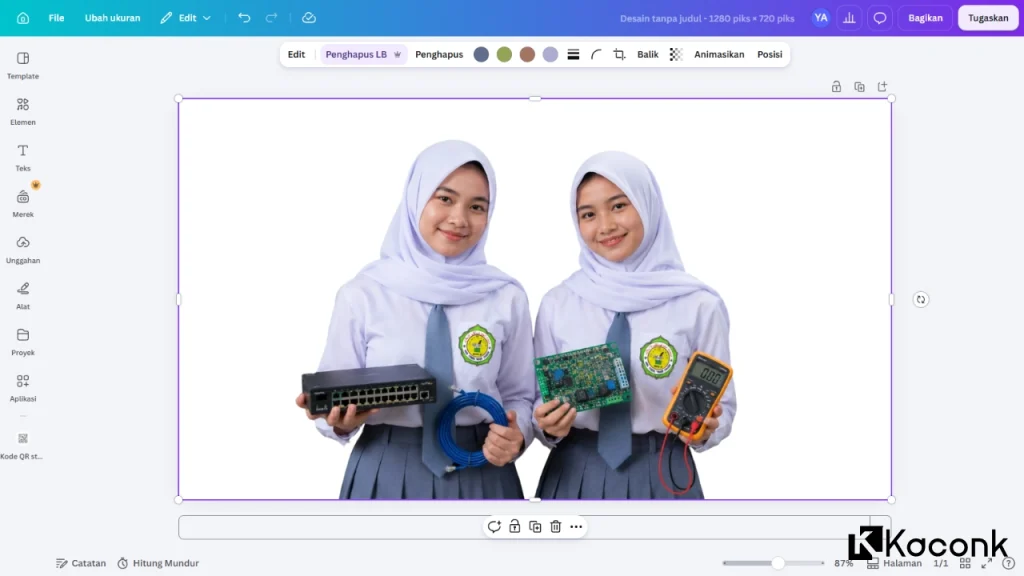
How to Remove a Photo Background in Canva

Want to remove the background from a photo in Canva quickly and easily? Canva makes it possible to remove unwanted backgrounds with just a few clicks, without requiring advanced photo-editing skills.
If you frequently use Canva for graphic design, you should know about its Background Remover feature. This tool can automatically detect the main subject in an image and remove the background, making it much easier to create clean and professional-looking designs.
You no longer need to switch to another online background removal tool or use complicated software such as Adobe Photoshop for simple background removal.
In this tutorial, we will show you how to remove a photo background in Canva using the latest Canva interface.
What Is Canva Background Remover?
Background Remover is a Canva photo-editing tool that uses AI to automatically separate the main subject from the background of an image.
Once the background has been removed, you can use the subject in other designs, place it over a different background, create product images, make social media graphics, or export it as a transparent PNG.
Canva describes the process as a one-click background removal feature, making it useful even for users with little or no photo-editing experience.
Do You Need Canva Pro to Remove a Background?
Canva’s background removal features are primarily associated with Canva Pro and other premium access options. Canva also currently provides some limited access to certain AI features for free users, so availability and usage limits can vary depending on your account and the feature being used.
If the BG Remover option is unavailable or you have reached your usage limit, Canva may ask you to upgrade your account.
Tip: Canva’s features and interface can change over time. The names and positions of some buttons may look slightly different depending on whether you use Canva in a desktop browser, the desktop app, or the mobile app.
How to Remove a Photo Background in Canva
The following steps use the current Canva editor interface and are intended primarily for desktop or web browser users.
Step 1: Open Canva
Go to Canva and open an existing design or create a new design.
You can choose any design size depending on what you are working on, such as:
- Instagram post
- Presentation
- Poster
- Product catalog
- YouTube thumbnail
- Social media graphic
- Custom-size design
Step 2: Upload Your Photo
Upload the image you want to edit.
You can upload a photo from your computer and place it onto your Canva design.
Canva supports several common image formats, including JPG, PNG, HEIC, and HEIF.
Once the image has been added to your design, click the photo to select it.
Step 3: Open the Image Editing Tools
After selecting the photo, look at the editing toolbar.
Depending on the current Canva interface, you may see an option such as:
Edit or Edit image
Click it to open the available image-editing tools.
Canva’s current editor provides access to photo editing and AI-powered tools from this area.
Step 4: Select BG Remover
Look for the BG Remover or Background Remover tool.
Click the option to start removing the background.
Canva will automatically analyze the image and separate the main subject from the background.
In most cases, the background will disappear within a few seconds.

Step 5: Check the Result
After Canva finishes processing the image, check the edges of the subject.
For simple photos with a clear separation between the subject and background, the result can be very clean.
If some parts of the background remain or parts of the subject are accidentally removed, you can refine the result using Canva’s editing controls.
Canva provides Erase and Restore options that allow you to manually remove or restore parts of the image after using Background Remover.
Step 6: Refine the Cutout if Necessary
If the automatic result isn’t perfect, use the available brush tools to make adjustments.
You can use:
Erase — Remove unwanted parts of the image.
Restore — Bring back parts of the original image that were accidentally removed.
You can also adjust the brush size to work more precisely around details such as hair, clothing, or other small areas.
Once you’re happy with the result, apply the changes.
And that’s it!
Your photo now has the background removed.
How to Make the Background Transparent
If your goal is to create a transparent PNG, removing the background is only part of the process.
After removing the background, click:
Share → Download
Then select:
PNG
If available in your account, enable:
Transparent background
Finally, click Download.
Canva specifically recommends downloading the image as a PNG when you want to preserve a transparent background.
This is particularly useful for:
- Logos
- Product photos
- Portraits
- Stickers
- Social media graphics
- Website images
- Presentation elements
- Thumbnails
How to Remove a Background Directly Without Starting a Design
Canva also provides a dedicated Background Remover page, so you don’t necessarily have to start by creating a design.
You can upload your image directly to Canva’s Background Remover tool, process the image, and then download or continue editing the result in Canva.
This can be useful when you simply want to remove a background from an image without creating a complete design first.
Can You Remove a Background on Canva Mobile?
Yes. Canva also provides background removal functionality on mobile devices.
The exact location of the option may differ from the desktop interface. In the mobile editor, select the image and look through the image editing or effects tools for the Background Remover option.
Canva’s own documentation shows that the mobile workflow uses the selected image and the available editing tools to access Background Remover.
Because Canva frequently updates its mobile interface, the position and appearance of the button may change between app versions.
What Can You Do After Removing the Background?
Removing the background is not the end of the editing process. Once your subject has been separated from the original background, you can continue designing it in many different ways.
For example, you can:
- Add a new background
- Change the background color
- Place the subject over another photo
- Add shadows
- Add text and graphic elements
- Crop or resize the image
- Apply filters
- Adjust brightness and colors
- Create product images
- Make social media content
Canva also allows you to add solid colors, gradients, images, videos, and AI-generated backgrounds to your design.
Other Canva AI and Photo Editing Features
Besides Background Remover, Canva includes many other tools that can make photo editing and graphic design easier.
Depending on your Canva plan and available features, you may find tools such as:
- Magic Eraser
- Magic Edit
- Magic Grab
- Grab Text
- Magic Expand
- AI-powered photo editing
- Image enhancement tools
- Background replacement tools
These features can help you make more advanced edits without having to move your project to professional desktop editing software.
Tips for Getting Better Background Removal Results
Although Canva’s Background Remover is automatic, the quality of the result can depend on the original photo.
For better results, try these tips:
Use a High-Quality Photo
A clear, high-resolution image usually makes it easier for Canva to identify the main subject.
Choose Photos With Clear Subjects
Images where the subject is clearly separated from the background generally produce better results.
Check Hair and Small Details
Fine details such as hair, fingers, thin objects, and complicated edges may require additional manual adjustments.
Use the Erase and Restore tools to correct these areas when necessary.
Download as PNG for Transparency
If you need the background to remain transparent, download the finished image as a PNG and enable the transparent background option when available.
Conclusion
That’s how to remove a photo background in Canva using the latest Canva interface.
The process is much easier than traditional background removal methods. Simply upload your photo, select the image, open the image editing tools, choose BG Remover, and let Canva automatically remove the background.
If the result needs additional adjustment, you can use the Erase and Restore tools to fine-tune the image.
After removing the background, you can place the subject into another design, add a new background, or download it as a transparent PNG.
Canva continues to add AI-powered tools that make graphic design and photo editing easier, so you can perform many common editing tasks without relying on complicated software.
We hope this tutorial helps you learn how to remove a background from a photo in Canva.
If you have any questions or run into problems while using Canva, feel free to leave a comment. We’ll be happy to help.
Stay tuned for more Canva tutorials and useful graphic design tips!
